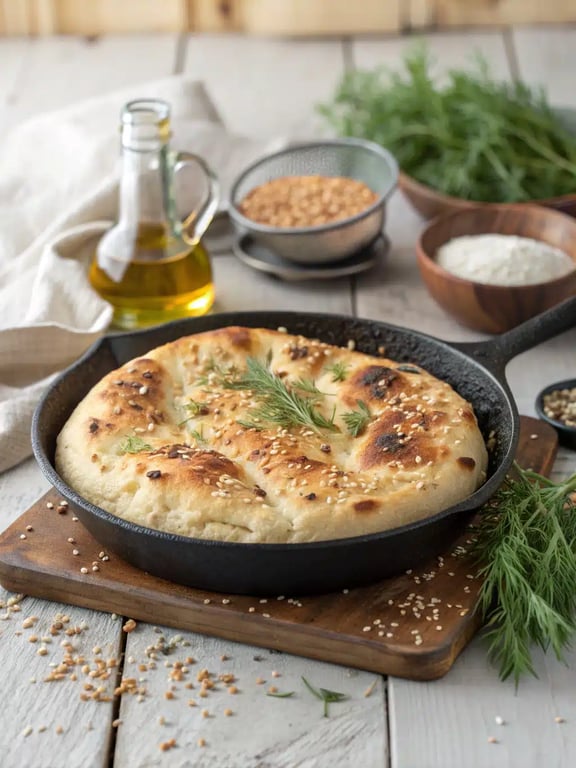
This warm, chewy flatbread has a perfectly blistered crust and a soft, airy interior, with a subtle tang from yogurt and a nutty aroma from toasted sesame and nigella seeds. It's a simple, rewarding stovetop bread that transforms any meal.
What Makes This Turkish Skillet Bread Recipe So Special
With just a handful of simple ingredients, this Turkish skillet bread recipe delivers a warm, chewy flatbread with a perfectly blistered crust and a soft, airy interior. The subtle tang from yogurt and the nutty aroma of toasted sesame and nigella seeds create a flavor that’s both rustic and incredibly inviting. It’s the kind of homemade Turkish bread that transforms a simple meal into something special, right from your stovetop. During our testing, we found that letting the dough rest after shaping is the secret to a relaxed, easy-to-roll texture. If you’ve ever wondered if you can really make restaurant-style bread at home, this Turkish bread easy method is your answer. Trust us, once you smell it cooking, you’ll understand why this skillet bread recipe is a team favorite. It’s simpler than it looks!
This post may contain affiliate recommendations. Please see our disclosure policy.
What You’ll Find in This Article
Ingredients for Your Turkish Skillet Bread Recipe
Here’s everything you’ll need to make this authentic-tasting Turkish flatbread skillet. We love how these pantry staples come together to create something truly magical.- 2 ¼ teaspoons active dry yeast (1 packet)
- 1 teaspoon granulated sugar
- 1 cup warm water (about 110°F)
- 3 cups all-purpose flour, plus more for dusting
- 1 teaspoon fine sea salt
- ¼ cup plain whole-milk yogurt, at room temperature
- 2 tablespoons extra-virgin olive oil, plus more for the bowl and skillet
- 1 tablespoon sesame seeds
- 1 tablespoon nigella seeds (optional)

Cook Time for Turkish Flatbread Skillet
We know your time is precious, so we’ve timed every step of this Turkish skillet bread recipe. The active hands-on time is quite short, but remember to account for the rising period. Here’s the breakdown:- Prep Time: 20 minutes (plus 1 hour rising)
- Cook Time: 15 minutes
- Total Time: About 1 hour 35 minutes
How to Make Turkish Pide Skillet
Follow these steps for a foolproof, delicious result. This Turkish pide skillet method is straightforward and incredibly rewarding.Step 1: Activate the Yeast
In a small bowl, combine the warm water, yeast, and sugar. Let it sit for about 5-10 minutes until it becomes foamy, which means the yeast is active.Step 2: Form the Dough
In a large mixing bowl, whisk together the flour and salt. Make a well in the center and pour in the yeast mixture, yogurt, and olive oil. Stir with a wooden spoon until a shaggy dough forms.Step 3: Knead and Rise
Turn the dough out onto a lightly floured surface and knead for 8-10 minutes until it becomes smooth and elastic. Place the dough in a lightly oiled bowl, cover with a damp kitchen towel, and let it rise in a warm spot for about 1 hour, or until doubled in size.Step 4: Shape and Rest
Gently punch down the risen dough and divide it into two equal pieces. Shape each piece into a smooth ball, cover them, and let them rest for 15 minutes to relax the gluten.
Step 5: Heat the Skillet and Roll
Heat a large cast-iron or heavy-bottomed skillet over medium heat. While it heats, roll one dough ball into a rough 8-9 inch circle, about ¼ inch thick. If the dough springs back, let it rest a minute longer.Step 6: Cook the First Side
Carefully place the rolled dough into the dry, hot skillet. Cook for 3-4 minutes until the bottom is golden brown with some darker spots.Step 7: Flip, Cook, and Finish
Flip the bread and cook for another 3-4 minutes on the second side. The bread should puff up slightly. Remove the cooked bread to a wire rack and brush the top lightly with a little olive oil. Sprinkle immediately with sesame seeds and nigella seeds, if using, so they adhere. Repeat the rolling and cooking process with the second dough ball.Step 8: Serve Warm
Let the breads cool for a few minutes before tearing or slicing. They are best served warm on the same day.
Pro Tips & Tasty Tweaks
After making this Turkish skillet bread recipe dozens of times, we’ve gathered our best team insights to help you nail it on the first try.- Flavor Swap: For a different aroma, try sprinkling with za’atar or dried oregano after brushing with oil.
- Heat Adjustment: If your bread is browning too fast but still feels doughy inside, reduce the heat to medium-low. A perfectly cooked skillet bread recipe needs time for the interior to cook through.
- Texture Fix: If the dough is stubborn and springs back while rolling, walk away for 5 more minutes. That extra rest makes all the difference for an easy-to-shape dough.
- Storage Tip: This bread is truly best the day it’s made. However, you can wrap any leftovers tightly in foil and reheat in a warm oven for a few minutes to refresh the texture.
Flavor & Texture Notes
When you make this Turkish skillet bread recipe correctly, you’ll be rewarded with a specific set of sensory cues. First, the aroma as it cooks is heavenly—toasty, yeasty, and slightly nutty from the seeds. The flavor of the bread itself is mild and slightly tangy from the yogurt, making it the perfect vehicle for dips or savory toppings. Texture is key here. You’re aiming for a crisp, blistered exterior with those classic dark spots from the hot skillet, giving way to a soft, tender, and slightly chewy interior. The bread should puff up invitingly, creating air pockets. When you tap the bottom, it should sound hollow, a sure sign your Turkish flatbread skillet is perfectly cooked through.Variations & Substitutions
One of the joys of this Turkish skillet bread recipe is its adaptability. While we love the classic version, don’t be afraid to make it your own with these team-tested ideas. For a herby twist, knead a handful of finely chopped fresh dill or parsley into the dough. You can also swap the all-purpose flour for half whole wheat flour for a heartier, nuttier flavor—just note the dough may be a bit denser. If you don’t have yogurt, an equal amount of buttermilk works beautifully to maintain the tender crumb and slight tang. For the seeds, black sesame or even a sprinkle of coarse salt makes a great topping if nigella seeds aren’t available. Finally, for a richer flavor, you can brush the finished bread with melted butter instead of olive oil before adding seeds.Make-Ahead & Scaling
We love recipes that fit into real life, and this Turkish skillet bread recipe is wonderfully flexible. You can absolutely prep parts of it ahead to make your cooking session smoother. For instance, the dough can be made a day in advance. After the first rise, simply punch it down, place it in an airtight container, and refrigerate it overnight. When you’re ready to cook, let the dough sit at room temperature for about 30 minutes before dividing and shaping. This homemade Turkish bread will still have fantastic flavor and texture. Scaling this Turkish flatbread skillet is straightforward. To make a larger batch for a crowd, simply double all the ingredients. You’ll need to work in batches to cook the breads, so keep the uncooked dough balls covered while you work. For a smaller batch, you can halve the recipe to make just one perfect bread. The cooking times remain the same, so you can focus on getting that beautiful, blistered crust on each piece of this skillet bread recipe.How to Serve Turkish Skillet Bread
This is where the fun really begins. We’ve found that tearing into a warm, freshly made Turkish pide skillet right at the table creates a moment of pure, shared joy. The aroma alone is an invitation to gather. For a simple and utterly satisfying meal, serve it alongside a bowl of creamy hummus, a vibrant cacık (yogurt with cucumber and herbs), or a rich, smoky eggplant dip. It’s also the perfect tool for scooping up stews, kebabs, or salads. Don’t overlook it for breakfast, either—a warm piece drizzled with honey or topped with labneh and fruit is a beautiful start to the day. Honestly, once you master this Turkish bread easy method, you’ll find excuses to make it for every meal. Our team’s favorite way? We love setting out a whole platter with small bowls of different dips, olives, and cheeses. Let everyone tear their own piece—it turns dinner into an interactive, relaxed feast.
Mistakes to Avoid
We’ve tested this Turkish skillet bread recipe countless times, and we’ve learned from every little hiccup along the way. Here are the most common pitfalls and how to steer clear of them for perfect results every time. First, using water that’s too hot for the yeast is a silent recipe killer. If your water is hotter than 110°F, it can deactivate the yeast, leaving you with a dense, flat bread. Always use a thermometer or test it on your wrist—it should feel warm, not hot. Another frequent issue is rolling the dough too thin or too thick. Aim for that ¼-inch thickness for the ideal balance of a crisp exterior and a soft, airy interior. If you roll it too thin, it can become cracker-like; too thick, and the center might stay doughy. Finally, don’t skip the resting period after shaping the dough balls. If you’ve ever struggled with dough that stubbornly springs back as you try to roll it, that’s the gluten telling you it needs more time to relax. A patient 15-minute rest makes rolling effortless and is the secret to a relaxed, easy-to-work-with dough for your homemade Turkish bread. Remember, cooking over too high heat can give you a burnt outside and a raw inside. Medium heat is your friend here, allowing the bread to cook through beautifully while developing those signature golden spots.How to Store Turkish Skillet Bread
Let’s be honest: this bread is truly at its peak within hours of making it. The texture and warmth are simply unbeatable. But we understand that leftovers happen, and we’ve found the best ways to preserve that deliciousness. For short-term storage, once the bread is completely cool, wrap it tightly in foil or place it in a zip-top bag at room temperature for up to one day. To recapture that just-made magic, reheat it in a 350°F oven for 5-7 minutes, or until warmed through. You can also reheat individual pieces directly in a dry skillet over medium heat for a minute on each side, which helps revive some of the crispness. For longer storage, this Turkish flatbread skillet freezes quite well. Wrap each cooled bread tightly in plastic wrap and then in foil before placing it in a freezer bag. It will keep for up to 2 months. Thaw at room temperature and then reheat in the oven or skillet as described above.Try This Turkish Skillet Bread Recipe Yourself
We genuinely hope you give this recipe a try. There’s something incredibly rewarding about mixing a few simple ingredients and watching them transform into a warm, fragrant, and utterly delicious bread right on your stovetop. This Turkish bread easy method is a fantastic gateway into the world of yeast breads if you’re a beginner, and a joyful, quick bake for seasoned cooks. We love how it makes any weeknight dinner feel like a special occasion. So, gather your flour and yeast, heat up that skillet, and get ready for the wonderful smell of baking bread to fill your kitchen. We’re confident this skillet bread recipe will become a regular in your home, just like it has in ours.Turkish Skillet Bread (Pide)
This warm, chewy flatbread has a perfectly blistered crust and a soft, airy interior, with a subtle tang from yogurt and a nutty aroma from toasted sesame and nigella seeds. It's a simple, rewarding stovetop bread that transforms any meal.
Ingredients
Equipment
Method
- In a small bowl, combine the warm water, yeast, and sugar. Let it sit for 5-10 minutes until foamy, indicating the yeast is active.
- In a large mixing bowl, whisk together the flour and salt. Make a well in the center and pour in the yeast mixture, yogurt, and olive oil. Stir with a wooden spoon until a shaggy dough forms.
- Turn the dough out onto a lightly floured surface and knead for 8-10 minutes until smooth and elastic. Place in a lightly oiled bowl, cover with a damp towel, and let rise in a warm spot for about 1 hour, or until doubled in size.
- Gently punch down the risen dough and divide it into two equal pieces. Shape each into a smooth ball, cover, and let rest for 15 minutes to relax the gluten.
- Heat a large cast-iron or heavy-bottomed skillet over medium heat. While it heats, roll one dough ball into a rough 8-9 inch circle, about ¼ inch thick. If the dough springs back, let it rest a minute longer.
- Carefully place the rolled dough into the dry, hot skillet. Cook for 3-4 minutes until the bottom is golden brown with darker spots.
- Flip the bread and cook for another 3-4 minutes on the second side until puffed up. Remove to a wire rack, brush the top lightly with olive oil, and immediately sprinkle with sesame and nigella seeds so they adhere.
- Repeat the rolling and cooking process with the second dough ball. Let the breads cool for a few minutes before tearing or slicing. Serve warm.
Nutrition
Notes
Pro Tips: For a different flavor, sprinkle with za'atar or dried oregano. If bread browns too fast but is still doughy inside, reduce heat to medium-low. If dough is hard to roll, let it rest 5 more minutes. Best served the day it's made. Reheat leftovers wrapped in foil in a warm oven.
Substitutions: Buttermilk can replace yogurt. Whole wheat flour can replace up to half the all-purpose flour. Black sesame or coarse salt can replace nigella seeds.
Tried this recipe?
Let us know how it was!Enjoyed the recipe? Share it!

Kitchen Essentials We Recommend
Tools that make cooking easier — tried, tested, and loved.


As an Amazon Associate we earn from qualifying purchases.
Got a recipe the world should try?
Share your favorite family recipe or national dish with food lovers in 100+ countries.
Submit Your RecipeFrequently Asked Questions
Can I make this bread without yogurt?
Absolutely. While yogurt adds a lovely tenderness and slight tang, you can substitute it with an equal amount of buttermilk. If you don’t have either, you can use additional warm water, though the crumb may be slightly less tender.
How do I know when the skillet is hot enough?
A good test is to sprinkle a few drops of water onto the dry skillet. If the water droplets sizzle and evaporate almost immediately, your pan is perfectly preheated and ready for your Turkish pide skillet dough.
Why didn’t my bread puff up?
If your bread stayed flat, the most common culprits are old/inactive yeast, water that was too hot and killed the yeast, or the skillet not being hot enough at the start of cooking. Ensuring your yeast is foamy and your pan is properly preheated are key steps for that beautiful puff.
Can I use a regular non-stick pan instead of cast iron?
Yes, a heavy-bottomed non-stick skillet will work. The goal is even, consistent heat. Cast iron is our favorite for achieving the deepest, most authentic browning, but any good skillet can turn out a delicious homemade Turkish bread.
")