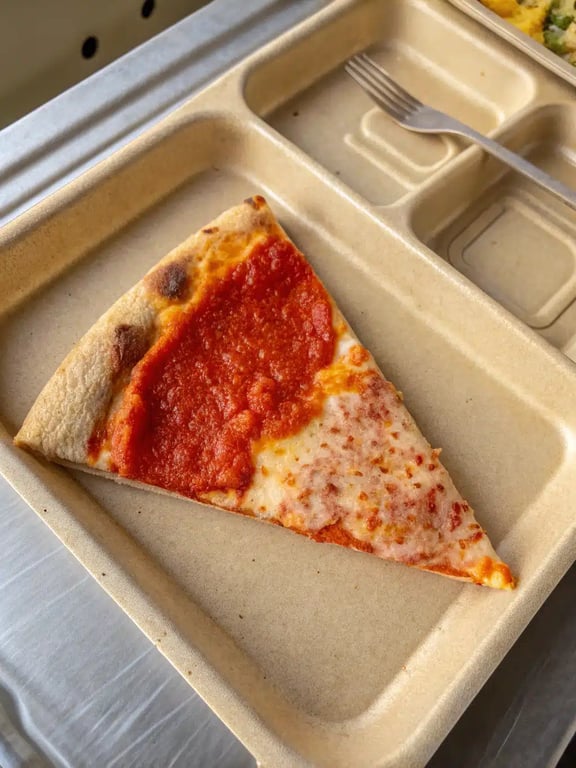
Recreate the iconic, nostalgic flavor of classic school lunch pizza with this simple recipe. A soft, chewy rectangle sheet pizza topped with tangy sauce and a thick, perfectly melted blanket of cheese, ready in about 30 minutes.
What Makes This School Cafeteria Pizza Recipe So Special
With just a handful of simple ingredients, this school cafeteria pizza recipe delivers that iconic, nostalgic flavor we all remember. Think of a soft, chewy rectangle sheet pizza topped with tangy sauce and a thick, perfectly melted blanket of cheese. It’s the ultimate homemade lunch pizza that’s as fun to make as it is to eat, promising that same cheesy school pizza experience right from your own oven. During our team tests, we discovered the key to that authentic texture lies in the cooling step. Letting the pizza rest for just five minutes after baking allows the cheese to set slightly, making it much easier to slice into those classic, satisfying squares. It’s a simple trick that makes all the difference. Trust us, one bite of this cheesy, comforting pizza will have you feeling like you’re back in the lunch line!
This post may contain affiliate recommendations. Please see our disclosure policy.
What You’ll Find in This Article
Ingredients for This School Cafeteria Pizza Recipe
Gathering your ingredients is the first step to recreating that beloved school lunch pizza. You’ll be pleased to see how straightforward the list is. For the best results, we recommend using a standard 10×15-inch rimmed baking sheet, which gives you that perfect rectangle shape.- 1 (13.8 ounce) can refrigerated pizza dough
- 1 cup pizza sauce
- 2 cups shredded low-moisture part-skim mozzarella cheese
- 1 tablespoon grated Parmesan cheese
- 1 teaspoon dried oregano
- 1 tablespoon olive oil

Cook Time for Cafeteria Pizza Dough
One of the best things about this school cafeteria pizza recipe is how quickly it comes together. From unrolling the dough to pulling a bubbling pizza from the oven, you’re looking at less than 30 minutes of active time. Here’s the breakdown we’ve timed in our own kitchens:- Prep Time: 10 minutes
- Cook Time: 15-18 minutes
- Total Time: About 30 minutes
How to Make Homemade Lunch Pizza
Follow these simple steps to create your own perfect rectangle sheet pizza. We’ve included our team’s little insights along the way to ensure your success.Step 1: Preheat and Prep
Preheat your oven to 425°F (218°C). Lightly grease a standard 10×15-inch rimmed baking sheet with a little of the olive oil.Step 2: Shape the Dough
Unroll the can of pizza dough directly onto the prepared baking sheet. Using your fingertips, gently press and stretch the dough to fit the pan, creating an even, rectangular layer that goes nearly to the edges.Step 3: Add the Sauce
Spread the pizza sauce evenly over the dough, leaving a narrow, bare border around the edges for the crust.Step 4: Layer the Cheese and Seasonings
Sprinkle the shredded mozzarella cheese in a thick, even layer over the sauce. Then, evenly dust the top with the grated Parmesan and dried oregano.
Step 5: Bake to Perfection
Bake for 15-18 minutes, or until the crust is golden brown and puffed at the edges, and the cheese is fully melted and bubbly with some light brown spots.Step 6: Cool and Set
Carefully remove the pizza from the oven. Let it cool on the pan for about 5 minutes to allow the cheese to set slightly, making it easier to slice cleanly.Step 7: Slice and Serve
Use a pizza cutter or sharp knife to slice into large squares. Serve warm for that authentic, soft yet chewy cafeteria-style texture.
Pro Tips & Tasty Tweaks
After making this school cafeteria pizza recipe countless times, our team has gathered a few favorite tips to help you nail it every time and make it your own.- Flavor Swap: For a herby twist, swap the dried oregano for an Italian seasoning blend or add a pinch of garlic powder to the sauce.
- Heat Adjustment: If your cheese is browning too quickly but the crust needs more time, simply place a loose sheet of foil over the top for the last few minutes of baking.
- Texture Fix: If your dough springs back when you’re trying to stretch it, let it sit at room temperature on the pan for 5-10 minutes. The gluten will relax, making it much easier to shape.
- Storage Tip: Leftovers reheat beautifully! For the best texture, warm squares in a toaster oven or air fryer for a few minutes until the cheese gets melty again.
Flavor & Texture Notes
When you get this school cafeteria pizza recipe just right, the experience is pure nostalgia. The flavor profile is straightforward and comforting: a tangy, slightly sweet tomato sauce balanced by the rich, milky taste of melted mozzarella, with a subtle savory note from the Parmesan and oregano. Texture is where this homemade lunch pizza truly shines. You’re aiming for a crust that’s soft and pleasantly chewy, not crisp or cracker-like. The edges should be puffed and lightly golden, while the center remains tender under its blanket of gooey, bubbly cheese. A perfect slice will hold its shape when lifted, with the cheese stretching just enough to remind you of those classic lunchroom trays.Variations & Substitutions
While the classic version is perfect as-is, part of the fun of this school cafeteria pizza recipe is making it your own. Here are a few team-approved twists that keep the spirit alive while adding a little personal flair. For a “supreme” style, sprinkle on sliced mushrooms, bell peppers, and black olives before adding the cheese. If you’re a fan of a little heat, a sprinkle of crushed red pepper flakes over the finished pizza does the trick. You can also experiment with the cheese blend; try replacing half the mozzarella with a mild provolone for a more complex flavor. If you need a substitution, don’t worry. No canned dough? A pound of store-bought fresh dough, rolled out to fit the pan, works wonderfully. For a dairy-free version, your favorite plant-based mozzarella shreds can stand in, though baking times may vary slightly. Ultimately, the goal is to create a cheesy school pizza that brings a smile to your table.Make-Ahead & Scaling
We love that this school cafeteria pizza recipe is so flexible for busy schedules and gatherings. If you want to get a head start, you can prep the components ahead of time. For instance, you can shred the cheese and measure out your spices a day in advance, storing them in airtight containers in the fridge. The real time-saver, however, is shaping the cafeteria pizza dough. You can press it into the greased pan, cover it tightly with plastic wrap, and refrigerate it for up to 24 hours before you’re ready to top and bake. When it comes to scaling, this recipe is wonderfully adaptable. For a smaller batch, simply use a half-sheet of dough and a smaller pan, adjusting the other ingredients proportionally and keeping a close eye on the bake time. To feed a crowd, you can easily double the recipe and use two baking sheets, though we recommend baking them one at a time on the middle rack for the most even heat. Just remember, whether you’re making one large rectangle sheet pizza or several, the key is that thick, even layer of cheese for that authentic cheesy school pizza experience.How to Serve This School Cafeteria Pizza Recipe
Part of the joy of this homemade lunch pizza is how it brings people together, just like it did in the cafeteria. We love serving it straight from the pan, letting everyone grab a warm, gooey square. For a truly nostalgic touch, serve it on a divided tray with classic sides. During our team tests, we found that a simple green salad with a tangy Italian dressing is the perfect fresh counterpoint to the rich, cheesy pizza. For kids (and kids at heart), a side of carrot sticks with ranch dressing or some apple slices completes the meal. To drink, nothing beats a cold glass of milk or lemonade—it’s the ultimate throwback combo that makes the whole experience feel special. One of our favorite reader tips is to cut the pizza into different sized squares—larger ones for the adults and smaller, bite-sized pieces for little hands. It makes this school lunch pizza fun for everyone at the table.Mistakes to Avoid
We’ve made our share of test batches to perfect this school cafeteria pizza recipe, so we want to help you sidestep the common pitfalls. After all, the goal is a perfect rectangle sheet pizza every time. A frequent misstep is using a cold dough straight from the fridge. If your cafeteria pizza dough is too cold, it will fight you when you try to stretch it, snapping back and making it hard to fit the pan. Let it sit at room temperature on the greased sheet for 5-10 minutes first—the gluten will relax, making it much easier to shape. Another common issue is overloading the sauce. It might be tempting to use more for extra flavor, but a heavy hand with the sauce can make the crust soggy. Stick to about one cup, spread thinly and evenly, leaving that bare border for the crust to puff up nicely. Finally, don’t skip the cooling step! We know it’s hard to wait when that cheesy school pizza smells so good, but slicing it immediately will cause the cheese to pull right off. Letting it rest for just five minutes allows everything to set, giving you those clean, picture-perfect squares. By avoiding these simple mistakes, you’re guaranteed a successful batch of that iconic homemade lunch pizza we all love.How to Store This School Cafeteria Pizza Recipe
Good news: this school cafeteria pizza recipe stores and reheats beautifully, so you can enjoy the nostalgia for days. Our team’s go-to method is to let any leftovers cool completely on the pan before transferring them to an airtight container. They’ll keep in the refrigerator for up to 3 days. For longer storage, you can freeze the squares. We like to place cooled slices in a single layer on a baking sheet to freeze them solid first (this is called flash-freezing), then transfer them to a freezer bag. This prevents them from sticking together, so you can pull out just one or two squares at a time. They’ll keep for about 2 months. When it’s time to reheat, we’ve found that the toaster oven or an air fryer set to 350°F works wonders, bringing back that melty cheese and lightly crisped edges in just a few minutes. The microwave works in a pinch, but it can make the crust a bit soft. No matter your method, a quick reheat brings this homemade lunch pizza right back to life.Try This School Cafeteria Pizza Recipe Yourself
We genuinely hope you give this school cafeteria pizza recipe a try in your own kitchen. It’s more than just a meal; it’s a fun, simple project that’s guaranteed to bring a smile and spark some happy memories. There’s something incredibly satisfying about pulling that golden, cheesy rectangle sheet pizza from your own oven. In all our testing, the moment we love most is hearing the “oohs” and “aahs” when we set the pan down on the table. It’s a universal reaction that proves the power of this cheesy school pizza. So, gather your simple ingredients, preheat your oven, and get ready for a delicious trip down memory lane. We’re confident this will become a quick favorite for weeknight dinners, game days, or just whenever you need a cozy, comforting bite.School Cafeteria Pizza
Recreate the iconic, nostalgic flavor of classic school lunch pizza with this simple recipe. A soft, chewy rectangle sheet pizza topped with tangy sauce and a thick, perfectly melted blanket of cheese, ready in about 30 minutes.
Ingredients
Equipment
Method
- Preheat your oven to 425°F (218°C). Lightly grease a standard 10x15-inch rimmed baking sheet with a little of the olive oil.
- Unroll the can of pizza dough directly onto the prepared baking sheet. Using your fingertips, gently press and stretch the dough to fit the pan, creating an even, rectangular layer that goes nearly to the edges.
- Spread the pizza sauce evenly over the dough, leaving a narrow, bare border around the edges for the crust.
- Sprinkle the shredded mozzarella cheese in a thick, even layer over the sauce. Then, evenly dust the top with the grated Parmesan and dried oregano.
- Bake for 15-18 minutes, or until the crust is golden brown and puffed at the edges, and the cheese is fully melted and bubbly with some light brown spots.
- Carefully remove the pizza from the oven. Let it cool on the pan for about 5 minutes to allow the cheese to set slightly, making it easier to slice cleanly.
- Use a pizza cutter or sharp knife to slice into large squares. Serve warm for that authentic, soft yet chewy cafeteria-style texture.
Nutrition
Notes
Pro Tips: Let cold dough sit at room temperature for 5-10 minutes for easier stretching. If cheese browns too quickly, tent with foil for the last few minutes of baking. For best reheating, use a toaster oven or air fryer.
Tried this recipe?
Let us know how it was!Enjoyed the recipe? Share it!

Kitchen Essentials We Recommend
Tools that make cooking easier — tried, tested, and loved.


As an Amazon Associate we earn from qualifying purchases.
Got a recipe the world should try?
Share your favorite family recipe or national dish with food lovers in 100+ countries.
Submit Your RecipeFrequently Asked Questions
Can I use homemade dough for this cafeteria pizza?
Absolutely! While canned dough gives that specific soft texture, about one pound of your favorite homemade or store-bought fresh pizza dough works perfectly. Just roll or press it to fit your 10×15-inch pan. You might need to adjust the bake time by a minute or two, so keep an eye on the crust’s color.
How do I prevent the cheese from browning too fast?
If your cheese is getting too dark but the crust needs more time, it’s an easy fix. Simply tent a loose piece of aluminum foil over the top of the pizza for the last 3-5 minutes of baking. This allows the cafeteria pizza dough to finish cooking without over-browning the delicious cheese topping.
What’s the best way to get clean slices?
Patience is the secret tool here! Letting your homemade lunch pizza cool on the pan for about five minutes after baking is crucial. This short rest allows the melted cheese to set slightly, so when you use a pizza cutter or sharp knife, you’ll get those perfect, clean squares instead of a cheesy mess.
Can I add toppings to this recipe?
You certainly can! For a classic “supreme” style, sprinkle on a handful of sliced mushrooms, bell peppers, or black olives right before you add the cheese. Just remember not to overload it—a light scattering ensures your school lunch pizza still bakes evenly and maintains that wonderful soft crust.
")