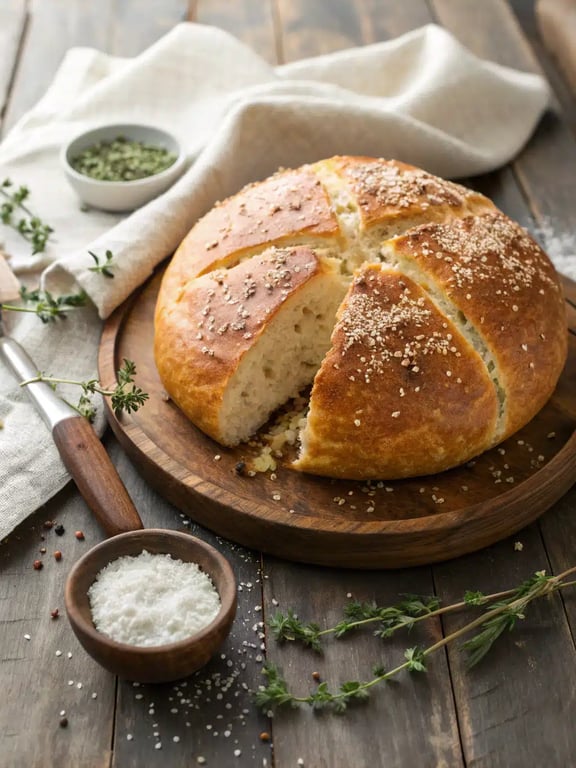
With just a handful of simple ingredients, this no knead Turkish bread delivers a stunningly crisp, blistered crust that gives way to a soft, airy interior with a subtle tang. It's the kind of homemade pita bread that transforms any meal with incredible flavor and texture developed through a long, slow rise and almost no hands-on work.
What Makes No Knead Turkish Bread So Special
With just a handful of simple ingredients, this no knead turkish bread delivers a stunningly crisp, blistered crust that gives way to a soft, airy interior with a subtle tang. It’s the kind of homemade pita bread that transforms any meal, from a simple soup to a lavish mezze spread, into something truly special. The magic lies in the long, slow rise, which develops incredible flavor and texture with almost no hands-on work from you. During our testing, we discovered that the key to this easy turkish bread is embracing the wet, sticky dough—it’s what creates those beautiful air pockets! One team member noted, “Don’t be tempted to add more flour; trust the process.” The result is so impressive, you’ll find yourself planning your next batch before the first one is even finished cooling.
This post may contain affiliate recommendations. Please see our disclosure policy.
What You’ll Find in This Article
Ingredients for No Knead Turkish Bread
Here’s everything you need for this wonderfully simple flatbread recipe. Consequently, you likely have most of it in your pantry already. The yogurt is our secret for a tender crumb and a hint of tang.- 3 cups all-purpose flour, plus more for dusting
- 1 ½ teaspoons kosher salt
- 1 teaspoon instant yeast
- 1 ¼ cups warm water (about 110°F)
- 2 tablespoons olive oil, plus more for the bowl
- 1 tablespoon plain yogurt
- 1 teaspoon sugar
- 2 tablespoons sesame seeds, for topping

Cook Time for Homemade Pita Bread
We love that this artisan bread recipe fits into your schedule, not the other way around. The active time is minimal, but the long fermentation is essential for that signature flavor and texture. Here’s the breakdown:- Prep Time: 20 minutes (plus 12-18 hours inactive rise)
- Cook Time: 40 minutes
- Total Time: 13 to 19 hours (mostly hands-off)
How to Make No Knead Turkish Bread
Follow these steps for perfect results every time. This no knead flatbread method is forgiving, so don’t worry about perfection.Step 1: Mix the Dough
In a large mixing bowl, whisk together the flour, salt, and instant yeast. In a separate bowl or measuring cup, combine the warm water, olive oil, yogurt, and sugar, stirring until the yogurt is mostly dissolved.Step 2: Combine and Rest
Pour the wet ingredients into the dry ingredients and stir with a sturdy wooden spoon until a shaggy, sticky dough forms and no dry flour remains. The dough will be quite wet and loose.
Step 3: The Long Rise
Cover the bowl tightly with plastic wrap and let the dough rise at room temperature for 12 to 18 hours. The dough is ready when it’s bubbly, more than doubled in size, and has a slightly domed surface.Step 4: Shape and Rest Again
Turn the risen dough out onto a well-floured surface. With floured hands, gently fold the dough over itself a few times to form a rough ball—avoid kneading or punching it down. Cover loosely with a kitchen towel and let it rest for 15 minutes.Step 5: Preheat Your Pan
Meanwhile, place a large cast-iron skillet or Dutch oven (with its lid) into your oven and preheat to 450°F. Let the pan heat for at least 30 minutes.Step 6: Bake Covered
Carefully remove the hot pan from the oven. Gently transfer the rested dough into the pan—it’s okay if it’s not perfectly shaped. Quickly sprinkle the top with sesame seeds. Cover with the hot lid and return to the oven.Step 7: Finish Baking
Bake covered for 25 minutes, then remove the lid. Continue baking for another 10 to 15 minutes, until the bread is deeply golden brown and sounds hollow when tapped on the bottom.Step 8: Cool Completely
Transfer the bread to a wire rack and let it cool completely, at least 1 hour, before slicing to allow the interior crumb to set.
Pro Tips & Tasty Tweaks
After many test batches, we’ve gathered our best insights to help you master this recipe. For instance, these small adjustments can make a big difference.- Flavor Swap: Replace the sesame seeds with everything bagel seasoning or za’atar for an herby, savory twist.
- Heat Adjustment: If your bread is browning too quickly after removing the lid, tent it loosely with foil for the remainder of the bake.
- Texture Fix: For an extra-crispy crust, let the shaped dough rest while the pan preheats for the full 30 minutes.
- Storage Tip: Store completely cooled bread in a paper bag at room temperature for up to 2 days. Reheat slices in a toaster or a hot skillet to revive the crispness.
Flavor & Texture Notes
When you get this no knead turkish bread right, the experience is unforgettable. Firstly, you’ll notice the aroma—a warm, yeasty, slightly nutty scent from the toasted sesame seeds. The crust should be deeply golden, hard, and shatteringly crisp when you first tap it. As you slice in, the interior tells the real story. You’re looking for an open, irregular crumb that’s soft and chewy, not dense. The flavor is complex: mildly tangy from the long fermentation and yogurt, perfectly salted, and wonderfully wheaty. Ultimately, a hollow sound when tapped on the bottom is your best signal that it’s fully baked and ready to cool.Variations & Substitutions
One of the joys of this easy turkish bread recipe is how adaptable it is. Therefore, feel free to make it your own with these team-approved ideas.- Whole Wheat: Substitute up to 1 cup of the all-purpose flour with whole wheat flour for a heartier flavor and texture.
- Seeded Loaf: Add 2 tablespoons of flax seeds or sunflower seeds to the dry ingredients for extra crunch and nutrition.
- Garlic & Herb: Brush the top of the shaped dough with olive oil and press minced garlic and dried rosemary into the surface before baking.
- Dairy-Free: The plain yogurt can be replaced with an equal amount of unsweetened dairy-free yogurt or even a bit more olive oil.
- Skillet Size: If you don’t have a Dutch oven, a large (10-12 inch) oven-safe skillet with a makeshift lid made from a baking sheet works perfectly.
Make-Ahead & Scaling
We love that this no knead turkish bread is so flexible for planning. Consequently, you can easily fit it into your weekly routine. The dough itself is the ultimate make-ahead component. After mixing, you can let it rise in the refrigerator for up to 24 hours instead of at room temperature. This slows the fermentation, which can actually develop even more complex flavor in your artisan bread recipe. When it comes to scaling, this simple flatbread recipe is wonderfully straightforward. For a smaller loaf, simply halve all the ingredients and use a smaller oven-safe pot or skillet. For a larger batch to feed a crowd, you can double the recipe. However, we recommend baking two separate loaves rather than trying to fit one massive dough into a single pot, as this ensures proper heat circulation and rise. If you need to hold the baked bread, the texture is best within a few hours. While you can wrap it and keep it at room temperature, the crust will soften. Don’t worry, though—a quick reheat in a hot oven or skillet will bring back that wonderful crispness beautifully.How to Serve No Knead Turkish Bread
This is where the real fun begins. We’ve found that tearing into a warm loaf of this homemade pita bread feels like a celebration, no matter the occasion. One of our favorite team memories is gathering around a fresh-baked loaf, everyone tearing off pieces and dipping them into a bowl of rich, herby olive oil before the bread had even fully cooled. For a simple yet stunning meal, serve it alongside a spread of dips like hummus, baba ganoush, or a whipped feta dip. It’s also the perfect companion for soups and stews, acting as both a utensil and a delicious side. For a more substantial feast, use it to make sandwiches with grilled vegetables, seasoned ground meat, or slices of roasted turkey. Don’t forget breakfast! Toasted slices are incredible with soft cheese, jam, or a drizzle of honey. The versatility of this easy turkish bread is truly its superpower. During testing, we realized the bread’s open crumb is perfect for soaking up flavors. So, if you’re serving it with a saucy dish, you’re in for a treat. Every bite becomes a perfect balance of crispy crust and flavorful, tender interior.
Mistakes to Avoid
We’ve made plenty of mistakes in our test kitchen so you don’t have to. Here are the most common pitfalls we encountered with this no knead flatbread and exactly how to steer clear of them.- Using Water That’s Too Hot: If your water is hotter than about 110°F, it can kill the yeast. Use a thermometer, or test it on your wrist—it should feel warm, not hot.
- Adding Extra Flour: The dough is meant to be wet and sticky. Adding too much flour during mixing or shaping is the top reason for a dense, tough loaf. Trust the process and use plenty of flour on your hands and work surface instead.
- Skipping the Preheated Pot: That blazing hot pot is what creates the initial oven spring and beautiful blistered crust. Don’t rush the 30-minute preheat.
- Slicing Too Soon: It’s tempting, but slicing into the bread before it’s fully cooled will result in a gummy interior. Let it rest for a full hour on a wire rack.
- Not Baking Long Enough Uncovered: If you remove the bread before it’s deeply golden and sounds hollow, the center can be underdone. That final 10-15 minutes of uncovered baking is crucial.
How to Store No Knead Turkish Bread
To keep your beautiful loaf at its best, a little know-how goes a long way. We learned through trial and error that the enemy of this bread’s perfect crust is trapped moisture. Therefore, never store it in a plastic bag while it’s still warm—this creates steam and turns the crust soft and chewy. For short-term storage, let the bread cool completely, then place it in a paper bag at room temperature for up to 2 days. The paper allows just enough airflow to keep the crust from getting soggy. For longer storage, freezing is your best friend. Wrap the cooled loaf or individual slices tightly in plastic wrap and then in foil before placing them in a freezer bag. It will keep well for up to 3 months. To reheat, our favorite method is to place frozen or room-temperature slices directly in a toaster or a dry skillet over medium heat until warm and re-crisped. For a whole loaf, wrap it in foil and warm it in a 350°F oven for 10-15 minutes, then unwrap and bake for another 5 minutes to crisp the crust.Try This No Knead Turkish Bread Yourself
We genuinely hope you give this recipe a try. There’s something incredibly satisfying about pulling a gorgeous, crackling loaf of no knead turkish bread from your own oven. It’s a project that requires more patience than effort, and the reward is immense. One of our team members said it best after her first successful bake: “I couldn’t believe I made something that looked and tasted like it came from a professional bakery.” That feeling of pride is what we wish for every home cook who tries this simple flatbread recipe. So, gather your simple ingredients, mix that sticky dough, and let time do its magic. Whether you serve it with a weeknight soup or as the centerpiece of a weekend gathering, we know it will become a cherished recipe in your kitchen, just as it has in ours.No Knead Turkish Bread
With just a handful of simple ingredients, this no knead Turkish bread delivers a stunningly crisp, blistered crust that gives way to a soft, airy interior with a subtle tang. It's the kind of homemade pita bread that transforms any meal with incredible flavor and texture developed through a long, slow rise and almost no hands-on work.
Ingredients
Equipment
Method
- In a large mixing bowl, whisk together the flour, salt, and instant yeast. In a separate bowl or measuring cup, combine the warm water, olive oil, yogurt, and sugar, stirring until the yogurt is mostly dissolved.
- Pour the wet ingredients into the dry ingredients and stir with a sturdy wooden spoon until a shaggy, sticky dough forms and no dry flour remains. The dough will be quite wet and loose.
- Cover the bowl tightly with plastic wrap and let the dough rise at room temperature for 12 to 18 hours. The dough is ready when it's bubbly, more than doubled in size, and has a slightly domed surface.
- Turn the risen dough out onto a well-floured surface. With floured hands, gently fold the dough over itself a few times to form a rough ball—avoid kneading or punching it down. Cover loosely with a kitchen towel and let it rest for 15 minutes.
- Meanwhile, place a large cast-iron skillet or Dutch oven (with its lid) into your oven and preheat to 450°F (230°C). Let the pan heat for at least 30 minutes.
- Carefully remove the hot pan from the oven. Gently transfer the rested dough into the pan—it's okay if it's not perfectly shaped. Quickly sprinkle the top with sesame seeds. Cover with the hot lid and return to the oven.
- Bake covered for 25 minutes, then remove the lid. Continue baking for another 10 to 15 minutes, until the bread is deeply golden brown and sounds hollow when tapped on the bottom.
- Transfer the bread to a wire rack and let it cool completely, at least 1 hour, before slicing to allow the interior crumb to set.
Nutrition
Notes
Pro Tips: Don't add extra flour to the wet dough—trust the process. For an extra-crispy crust, let the shaped dough rest while the pan preheats for the full 30 minutes. If browning too quickly after removing the lid, tent loosely with foil.
Storage: Store completely cooled bread in a paper bag at room temperature for up to 2 days. Reheat slices in a toaster or hot skillet to revive crispness. Freeze for longer storage.
Storage: Store completely cooled bread in a paper bag at room temperature for up to 2 days. Reheat slices in a toaster or hot skillet to revive crispness. Freeze for longer storage.
Tried this recipe?
Let us know how it was!Enjoyed the recipe? Share it!

Kitchen Essentials We Recommend
Tools that make cooking easier — tried, tested, and loved.


As an Amazon Associate we earn from qualifying purchases.
Got a recipe the world should try?
Share your favorite family recipe or national dish with food lovers in 100+ countries.
Submit Your RecipeFrequently Asked Questions
Can I use active dry yeast instead of instant yeast?
Absolutely. If using active dry yeast, we recommend “blooming” it first. Simply mix it with the warm water and sugar from the recipe and let it sit for 5-10 minutes until foamy. Then, proceed by adding the oil and yogurt to this mixture before combining with the dry ingredients.
Why is my no knead bread so dense?
A dense loaf is usually caused by one of three things: adding too much flour to the wet dough, not letting it rise long enough (the dough should be very bubbly), or cutting into it before it has cooled completely. Trust the sticky dough and the full cooling time for that perfect, airy crumb.
Do I have to use a Dutch oven?
While a Dutch oven or heavy cast-iron pot is ideal for trapping steam, you can use any heavy, oven-safe pot with a tight-fitting lid. A deep cast-iron skillet covered tightly with foil or a baking sheet can also work in a pinch for this easy turkish bread.
How do I know when the bread is done baking?
Look for a deep, golden-brown crust. The most reliable test is the sound: carefully remove the bread from the pot and tap the bottom. If it makes a hollow, drum-like sound, it’s fully baked. If it sounds dull, return it to the oven (without the lid) for a few more minutes.
")