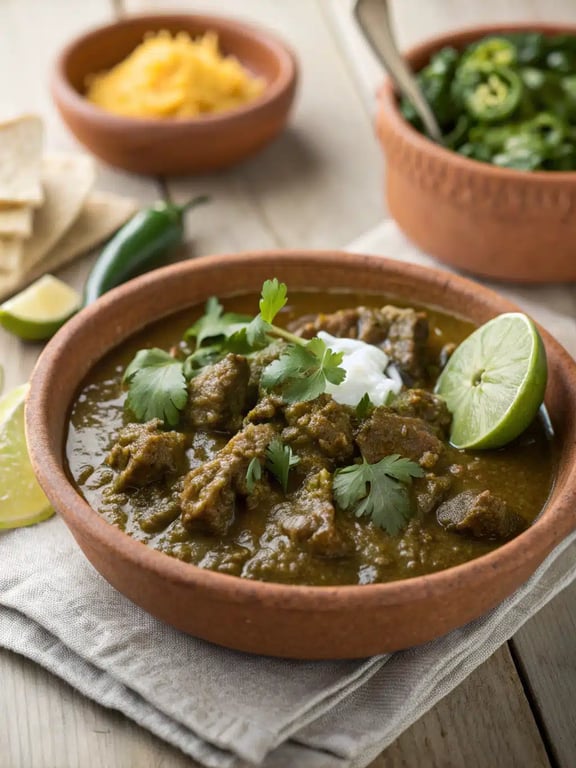
This vibrant Mexican Beef Chili Verde is a soul-warming stew of tender, slow-braised beef, tangy tomatillos, and fresh peppers. It's a beautiful balance of rustic comfort and fresh flavor, perfect for a cozy family dinner or casual gathering.
.What Makes Mexican Beef Chili Verde So Special
With just a handful of simple ingredients, this Mexican beef chili verde delivers a vibrant, soul-warming experience that’s unlike any other chili. It’s a beautiful balance of tender, slow-braised beef, tangy tomatillos, and a gentle heat from fresh peppers, all simmered into a rich and comforting stew. The result is a deeply flavorful green chili beef that feels both rustic and incredibly fresh, perfect for a cozy family dinner or a casual gathering with friends. During our testing, we discovered a simple trick that makes a world of difference: using the cilantro stems. While we save the leaves for a bright finish, those stems add a wonderful, earthy depth to the broth as it simmers. It’s a small step that maximizes flavor from a single ingredient. Trust us, once you try this chili verde recipe, it’s going to become a regular in your rotation—it’s that good and surprisingly straightforward to make!
This post may contain affiliate recommendations. Please see our disclosure policy.
What You’ll Find in This Article
Ingredients for Mexican Beef Chili Verde
Here’s everything you’ll need to create this incredible Mexican green chili. We love how these fresh, bright ingredients come together to build such complex flavor.- 2 pounds boneless beef chuck roast, cut into 1-inch cubes
- 2 tablespoons vegetable oil
- 1 large yellow onion, chopped
- 4 cloves garlic, minced
- 1 pound tomatillos, husked, rinsed, and quartered
- 2 poblano peppers, seeded and chopped
- 2 jalapeño peppers, seeded and minced
- 1 bunch fresh cilantro, stems and leaves separated
- 1 teaspoon ground cumin
- 1 teaspoon dried oregano
- 4 cups low-sodium chicken broth
- 1 (15-ounce) can white hominy, drained and rinsed
- 1 lime, juiced
- Salt and freshly ground black pepper to taste

Cook Time for Slow Cooker Chili
While we developed this Mexican beef chili verde for the stovetop, we know many of you love the convenience of a slow cooker. Fortunately, the hands-off approach works beautifully here! For a classic slow cooker chili method, you can brown the beef and sauté the aromatics as directed, then transfer everything to your cooker. Set it on low for 7-8 hours or high for 4-5 hours, adding the hominy in the last 30 minutes. Either way, the total active prep time is about 30 minutes, with the majority of the cook time being wonderfully hands-off.How to Make Green Chili Beef
Follow these simple steps for a perfectly tender and flavorful green chili beef. We’ve broken it down to make the process clear and stress-free.Step 1: Sear the Beef
Pat the beef cubes dry with paper towels and season generously with salt and pepper. In a large Dutch oven or heavy pot, heat the oil over medium-high heat. Brown the beef in batches until deeply seared on all sides, about 6-8 minutes per batch. Transfer the browned beef to a plate.Step 2: Build the Flavor Base
In the same pot, reduce the heat to medium. Add the chopped onion and cook, stirring occasionally, until softened, about 5 minutes. Add the minced garlic, cumin, and oregano, and cook for 1 minute until fragrant.Step 3: Combine and Simmer
Add the tomatillos, poblano peppers, jalapeños, and the cilantro stems to the pot. Pour in the chicken broth, scraping the bottom to release any browned bits. Return the seared beef and any accumulated juices to the pot.Step 4: Slow Cook to Tenderness
Bring the mixture to a boil, then immediately reduce the heat to low. Cover the pot and simmer gently for 1 hour and 30 minutes, stirring occasionally, until the beef is fork-tender and the tomatillos have broken down.
Step 5: Thicken and Add Hominy
Stir in the drained hominy and continue to simmer, uncovered, for another 20-30 minutes until the chili has thickened slightly to your liking.Step 6: Finish with Freshness
Remove the pot from the heat. Stir in the lime juice and the chopped cilantro leaves. Taste and adjust seasoning with more salt and pepper as needed. Let the chili rest for 10 minutes before serving to allow the flavors to meld.Pro Tips & Tasty Tweaks
After making this Mexican beef chili verde countless times, our team has gathered some favorite insights to help you nail it on the first try.- Flavor Swap: For a richer, smokier note, char the poblano peppers directly over a gas flame or under the broiler until blackened, then steam in a bowl covered with plastic wrap. Peel off the skin before chopping.
- Heat Adjustment: Control the spice level by adjusting the jalapeños. For mild heat, remove all seeds and ribs. For more kick, leave some in, or add a minced serrano pepper.
- Prep Fix: Don’t skip drying the beef before searing! A dry surface is the secret to getting that perfect, caramelized crust that adds so much flavor to the whole pot.
- Storage Tip: This chili tastes even better the next day. Store it in an airtight container in the fridge for up to 4 days. Reheat gently on the stovetop, adding a splash of broth if it has thickened too much.
Flavor & Texture Notes
When your Mexican beef chili verde is done, you’ll be greeted by a wonderfully complex aroma—tangy, herbal, and deeply savory all at once. The texture should be hearty and stew-like, with the beef shredding easily with a fork and the tomatillos completely broken down into the sauce. The hominy adds a delightful, soft chew that’s a signature of a great chili verde recipe. Taste-wise, look for a bright acidity from the tomatillos and lime, balanced by the earthy cumin and the subtle warmth from the peppers. The final stir of fresh cilantro brings a pop of color and a clean, herbal finish that ties everything together beautifully.Variations & Substitutions
We love this Mexican beef chili verde as written, but we also encourage you to make it your own! Here are some team-approved tweaks and swaps that keep the spirit of the dish intact. For a different protein, try using an equal amount of boneless, skinless chicken thighs. They become incredibly tender with the same cooking method. If you can’t find tomatillos, a combination of green tomatoes and an extra squeeze of lime can work in a pinch, though the flavor will be slightly different. Not a fan of hominy? Great northern or cannellini beans make a fantastic, creamy substitute. To add more vegetables, stir in a cup of fresh or frozen corn along with the hominy. Finally, for a richer, deeper base, swap half of the chicken broth for a good beef broth.Make-Ahead & Scaling
We love a recipe that respects your time, and this Mexican beef chili verde is a fantastic candidate for prepping ahead. In fact, we often find that making it a day in advance deepens the flavors beautifully. You can fully prepare the entire green chili beef up to two days before serving. Simply let it cool completely, then store it in an airtight container in the refrigerator. When you’re ready, gently reheat it on the stovetop, adding a splash of broth if it has thickened too much. If you’re scaling up for a crowd, this chili verde recipe doubles easily. Just be sure to use a pot large enough to comfortably hold everything without being overly full, and you may need to extend the final simmering time by 10-15 minutes to reach your desired thickness. For a smaller batch, halving the recipe works perfectly in a medium-sized pot, though the cooking time will remain roughly the same to achieve that fork-tender beef.How to Serve Mexican Beef Chili Verde
One of our favorite parts of recipe testing is figuring out the perfect way to serve a dish, and with this Mexican green chili, the options are wonderfully versatile. We love building a cozy, interactive meal where everyone can customize their bowl. Start with a generous ladle of the hot chili, then let the toppings do the talking. For a truly satisfying meal, we recommend warm corn or flour tortillas on the side for scooping. A bowl of creamy avocado slices, a dollop of cool sour cream, a sprinkle of crumbled queso fresco or shredded Monterey Jack, and extra lime wedges are our non-negotiable finishing touches. A simple side of cilantro-lime rice or a crisp green salad balances the hearty stew perfectly. During one of our team dinners, we discovered that this slow cooker chili (when made using that method) is also incredible spooned over baked potatoes or tucked into burritos for a next-day lunch. Don’t be afraid to get creative with your leftovers!
Mistakes to Avoid
We’ve made our share of mistakes in the kitchen so you don’t have to! Here are the most common pitfalls we’ve seen (and sometimes stumbled into ourselves) with this Mexican beef chili verde, and how to steer clear for the best results every time. First, never skip searing the beef. If you’ve ever wondered why a stew tastes bland, it’s often because this step was rushed or skipped. Those browned bits are pure flavor gold for your beef chili verde. Second, don’t rush the simmer. The beef needs that full, gentle cook time to become truly tender; boiling it will make it tough. Third, remember to add the hominy and lime juice at the end. Adding hominy too early can make it mushy, and cooking the fresh lime juice will dull its bright acidity. Another common question is about the consistency. If your chili verde recipe seems too thin, just let it simmer uncovered a bit longer to reduce. Conversely, if it gets too thick, a splash of broth or water will loosen it right up. Finally, always taste and adjust the seasoning at the very end, after you’ve added the lime juice, as it can change the salt perception.How to Store Mexican Beef Chili Verde
Good news: this chili might taste even better tomorrow! Proper storage is simple and ensures you can enjoy this Mexican beef chili verde for days. After cooking, let the pot cool to room temperature before transferring it to storage containers. We prefer using glass containers with tight-fitting lids. In the refrigerator, your green chili beef will stay fresh and delicious for up to 4 days. For longer storage, it freezes beautifully for up to 3 months. Portion it into freezer-safe bags or containers, leaving about an inch of space for expansion. To reheat, thaw overnight in the fridge if frozen, then warm gently on the stovetop over medium-low heat, stirring occasionally. You may need to add a little broth or water when reheating to bring it back to the perfect saucy consistency.Try This Mexican Beef Chili Verde Yourself
We genuinely hope you give this Mexican beef chili verde a try in your own kitchen. It’s the kind of recipe that fills your home with an incredible aroma and delivers a meal that feels both special and completely approachable. We’ve shared all our tested tips and tricks so you can feel confident from the first sear to the final garnish. Whether you’re cooking for a busy weeknight or a relaxed weekend gathering, this Mexican green chili is a guaranteed crowd-pleaser. It’s become a staple in our own recipe rotations, and we’re so excited for it to become one in yours, too. Grab your Dutch oven, gather those fresh ingredients, and get ready for a seriously delicious dinnerMexican Beef Chili Verde
This vibrant Mexican Beef Chili Verde is a soul-warming stew of tender, slow-braised beef, tangy tomatillos, and fresh peppers. It's a beautiful balance of rustic comfort and fresh flavor, perfect for a cozy family dinner or casual gathering.
Ingredients
Equipment
Method
- Pat the beef cubes dry with paper towels and season generously with salt and pepper. In a large Dutch oven or heavy pot, heat the oil over medium-high heat. Brown the beef in batches until deeply seared on all sides, about 6-8 minutes per batch. Transfer the browned beef to a plate.
- In the same pot, reduce the heat to medium. Add the chopped onion and cook, stirring occasionally, until softened, about 5 minutes. Add the minced garlic, cumin, and oregano, and cook for 1 minute until fragrant.
- Add the tomatillos, poblano peppers, jalapeños, and the cilantro stems to the pot. Pour in the chicken broth, scraping the bottom to release any browned bits. Return the seared beef and any accumulated juices to the pot.
- Bring the mixture to a boil, then immediately reduce the heat to low. Cover the pot and simmer gently for 1 hour and 30 minutes, stirring occasionally, until the beef is fork-tender and the tomatillos have broken down.
- Stir in the drained hominy and continue to simmer, uncovered, for another 20-30 minutes until the chili has thickened slightly to your liking.
- Remove the pot from the heat. Stir in the lime juice and the chopped cilantro leaves. Taste and adjust seasoning with more salt and pepper as needed. Let the chili rest for 10 minutes before serving to allow the flavors to meld.
Nutrition
Notes
Pro Tips: For a smokier flavor, char the poblano peppers before adding. Control spice by adjusting jalapeño seeds. This chili tastes even better the next day. Store in the fridge for up to 4 days or freeze for up to 3 months.
Slow Cooker Method: After browning beef and sautéing aromatics, transfer everything (except hominy, lime, and cilantro leaves) to a slow cooker. Cook on low for 7-8 hours or high for 4-5 hours. Add hominy in the last 30 minutes, then finish with lime and cilantro.
Tried this recipe?
Let us know how it was!Enjoyed the recipe? Share it!

Kitchen Essentials We Recommend
Tools that make cooking easier — tried, tested, and loved.


As an Amazon Associate we earn from qualifying purchases.
Got a recipe the world should try?
Share your favorite family recipe or national dish with food lovers in 100+ countries.
Submit Your RecipeFrequently Asked Questions
Can I make this chili verde recipe in a slow cooker?
Absolutely! For a classic slow cooker chili method, brown the beef and sauté the onions and garlic as directed in the recipe. Then, transfer everything (except the hominy, lime, and cilantro leaves) to your slow cooker. Cook on low for 7-8 hours or high for 4-5 hours. Stir in the hominy during the last 30 minutes of cooking, then finish with lime juice and cilantro.
How do I adjust the spiciness of my green chili beef?
The heat level is very easy to control. For a milder beef chili verde, be sure to remove all the seeds and white ribs from the jalapeño peppers before mincing them. For more kick, leave some seeds in or add a minced serrano pepper. You can always adjust the final heat by serving with sliced fresh jalapeños on the side.
What can I use instead of hominy in this chili?
If you can’t find hominy or prefer a substitute, canned white beans like great northern or cannellini beans work wonderfully. They add a similar creamy texture and heartiness to your chili verde recipe. Just drain and rinse them, then add them at the same time you would add the hominy.
Why is my chili verde too watery?
A watery Mexican beef chili verde usually just needs more time to reduce. After adding the hominy, be sure to simmer the chili uncovered. This allows excess liquid to evaporate and the sauce to thicken naturally. Let it bubble gently until it reaches your preferred stew-like consistency.
")