What Makes key lime cake So Special
With just a handful of simple ingredients, this key lime cake delivers a burst of bright, sunny flavor wrapped in a tender, buttery crumb. It’s the kind of key lime dessert that feels both refreshing and indulgent, with a perfect balance of sweet and tart that makes every bite irresistible. Whether you’re celebrating a special occasion or just craving a slice of sunshine, this cake is guaranteed to be the star of the table.
During our testing, we found that the secret to the most vibrant flavor lies in using fresh key lime juice and zest. While bottled juice works in a pinch, the zest is non-negotiable for that aromatic punch. One of our team members noted, “The zest is where the magic lives—it makes the whole kitchen smell incredible.” Trust us, once you try this recipe, you’ll see why it’s simpler than it looks and more delicious than you can imagine!
This post may contain affiliate recommendations. Please see our disclosure policy.
What You’ll Find in This Article
Ingredients for key lime cake
Here’s everything you’ll need to create this sunny, flavorful key lime cake. We recommend having all your ingredients at room temperature for a smooth, perfectly combined batter.
- 2 ½ cups all-purpose flour
- 1 ½ cups granulated sugar
- 1 teaspoon baking powder
- ½ teaspoon baking soda
- ½ teaspoon salt
- 1 cup unsalted butter, at room temperature
- 3 large eggs, at room temperature
- 1 cup buttermilk, at room temperature
- ⅓ cup key lime juice, freshly squeezed
- 2 tablespoons key lime zest
- 1 teaspoon pure vanilla extract

Cook Time for key lime dessert
We know you’re eager to get baking, so here’s a quick timeline to help you plan. From start to finish, this key lime cake is a wonderfully achievable project for any afternoon.
- Prep Time: 20 minutes
- Cook Time: 45-55 minutes (for a Bundt pan) or 25-30 minutes (for round layers)
- Cooling Time: 1 hour (minimum)
- Total Time: About 2 hours 15 minutes
How to Make key lime cake
Follow these straightforward steps for a perfectly baked cake. We’ve included our team’s best tips along the way to ensure your success.
1. Preheat and Prepare Your Pan
Preheat your oven to 350°F. Grease and flour a 10-inch Bundt pan or two 9-inch round cake pans, tapping out any excess flour.
2. Combine the Dry Ingredients
In a medium bowl, whisk together the flour, baking powder, baking soda, and salt until well combined and set aside. This ensures your leaveners are evenly distributed for a uniform rise.

3. Cream Butter, Sugar, and Add Wet Ingredients
In a large mixing bowl, beat the butter and sugar together on medium-high speed for 3 to 4 minutes, until light and fluffy. Beat in the eggs one at a time, fully incorporating each before adding the next, then mix in the vanilla extract and key lime zest.
4. Alternate Dry Ingredients and Buttermilk
With the mixer on low speed, add the dry ingredients and buttermilk to the butter mixture in three alternating additions, beginning and ending with the dry ingredients. Mix just until the batter is smooth, then gently fold in the key lime juice by hand.

5. Bake Until Golden
Pour the batter into your prepared pan(s) and smooth the top. Bake for 45-55 minutes for a Bundt pan or 25-30 minutes for round layers, until a toothpick inserted into the center comes out clean.
6. Cool Completely
Let the cake cool in the pan on a wire rack for 15 minutes, then carefully invert it onto the rack to cool completely before frosting or serving
Pro Tips & Tasty Tweaks
After baking dozens of these cakes, we’ve gathered our favorite insights to help you nail it on the first try. Here are a few tweaks we love.
- Flavor Swap: For a different citrus twist, try using a mix of lemon and lime zest and juice. The cake will still be wonderfully bright and tangy.
- Timing/Heat Adjustment: Ovens can vary, so start checking for doneness a few minutes early. The cake is done when it’s golden, pulls away from the pan’s edges slightly, and a toothpick comes out clean.
- Prep/Texture Fix: If you don’t have buttermilk, make your own by adding 1 tablespoon of white vinegar or lemon juice to 1 cup of milk. Let it sit for 5 minutes before using.
- Storage Tip: Store the unfrosted cake, tightly wrapped, at room temperature for up to 2 days. For longer storage, freeze the cooled cake layers wrapped in plastic and foil for up to 3 months.
Flavor & Texture Notes
When you get this key lime cake just right, it’s a true celebration of flavor and texture. We want you to know exactly what to look for so you can bake with confidence.
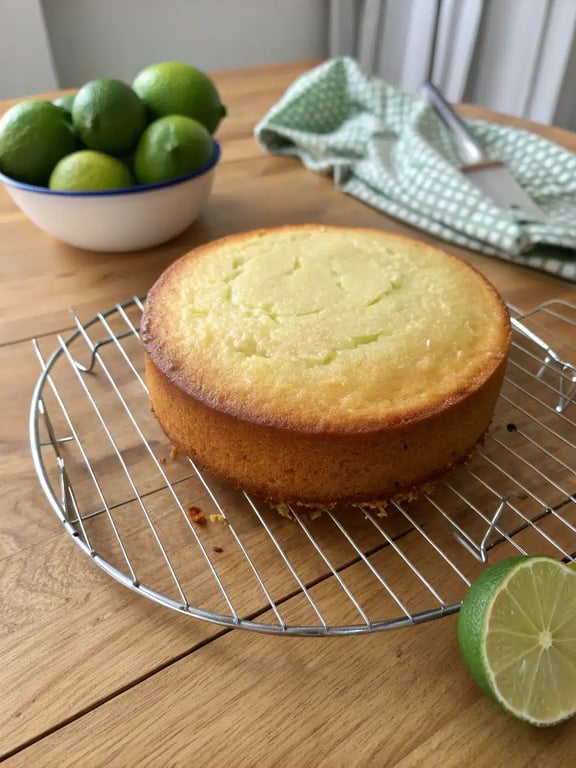
The aroma as it bakes is heavenly—a buttery, sweet scent with sharp, floral notes from the lime zest. Once baked, the cake should have a beautiful, even golden-brown color. The texture is the real star: incredibly tender and moist with a fine, soft crumb that practically melts in your mouth. The flavor is a perfect harmony. It’s not mouth-puckeringly sour, but has a distinct, refreshing tartness from the key lime juice that’s beautifully balanced by the sweet, rich cake. A simple key lime glaze poured over the top amplifies that bright flavor perfectly, making each slice irresistible.
Variations & Substitutions
We love this classic version, but part of the fun of baking is making a recipe your own. Here are some of our favorite ways to mix things up, all while keeping that signature sunny flavor front and center.
For a stunning presentation, turn this recipe into key lime cupcakes. Simply divide the batter among lined muffin tins and bake for 18-22 minutes. They’re perfect for parties! If you’re a fan of creamy toppings, a lush key lime frosting made with cream cheese, butter, powdered sugar, and lime zest is a game-changer. Alternatively, a simple key lime glaze of powdered sugar and fresh juice drizzled over the warm cake soaks in beautifully for extra moisture and tang. Don’t have key limes? Regular Persian limes work wonderfully—you might just need an extra tablespoon of juice to match the flavor intensity. For a nutty twist, fold in ¾ cup of finely chopped toasted macadamia nuts or shredded coconut into the batter before baking.
Make-Ahead & Scaling
We love a recipe that fits into a busy schedule, and this key lime cake is wonderfully flexible. Whether you’re planning for a party or just want to spread out the work, we’ve got you covered with our favorite make-ahead and scaling strategies.
You can bake the cake layers up to two days in advance. Let them cool completely, then wrap them tightly in plastic wrap and store at room temperature. For longer storage, freeze the wrapped layers for up to 3 months; just thaw overnight on the counter before frosting. The batter itself, however, is best baked right away. If you’re scaling up for a crowd, you can easily double the recipe. For a double batch, we recommend using two Bundt pans or four 9-inch round pans and rotating them in the oven halfway through baking to ensure even cooking. Conversely, for a smaller key lime dessert, you can halve the ingredients and bake in a loaf pan for about 40-45 minutes. The texture holds up beautifully, though we find the flavor is brightest when served within a day or two of baking.
How to Serve key lime cake
Now for the best part—serving up this sunny slice of heaven! A simple key lime cake is stunning on its own, but a few thoughtful touches can turn it into a truly memorable centerpiece.
During one of our team tastings, someone brought in a jar of homemade raspberry jam, and the combination of tart berry and bright lime was an instant hit. It inspired us to think about all the delicious ways to plate this cake. For a classic finish, a simple key lime glaze drizzled over the top adds a beautiful sheen and an extra punch of flavor. If you’re feeling indulgent, a generous swirl of key lime frosting made with cream cheese and butter transforms it into a decadent layer cake. We love serving it with a dollop of lightly sweetened whipped cream and a few fresh berries on the side. For a casual gathering, turn the recipe into adorable key lime cupcakes—they’re perfectly portable and always a crowd-pleaser.
No matter how you serve it, we always recommend letting the cake sit at room temperature for about 30 minutes before slicing. This allows the flavors to fully wake up and the texture to become perfectly tender.
Mistakes to Avoid
We’ve made our share of baking blunders so you don’t have to! Here are the most common pitfalls we’ve encountered with this key lime cake and exactly how to steer clear of them.
First, overmixing the batter is a top culprit for a tough, dense cake. Once you add the flour, mix just until the last streaks disappear. Overworking the gluten is a surefire way to lose that tender crumb we all love. Second, using cold ingredients can cause your batter to curdle and result in an uneven bake. Make sure your butter, eggs, and buttermilk are truly at room temperature—it makes a world of difference for a smooth, emulsified batter. Another frequent question we get is, “Why did my cake sink in the middle?” This usually happens if the cake is underbaked or if the oven door is opened too early. Be patient and use the toothpick test for doneness. Finally, skipping the zest is a major flavor miss. The zest holds the essential oils that give this key lime dessert its incredible aromatic punch. Bottled juice can work, but fresh zest is non-negotiable for the best taste.
By avoiding these simple missteps, you’re guaranteed a moist, flavorful, and beautifully risen key lime cake every single time.
How to Store key lime cake
Proper storage is the secret to enjoying your key lime cake for days to come. We tested several methods to find the best way to keep it fresh and flavorful.
Our team found that an unfrosted or glazed cake stores beautifully at room temperature. Simply place the completely cooled cake under a cake dome or in an airtight container. It will stay moist and delicious for up to two days. If your cake is frosted with a cream cheese-based key lime frosting, it needs to be refrigerated. Let it chill uncovered for about 15 minutes to set the frosting, then cover it loosely with plastic wrap or a lid. It will keep in the fridge for up to 4 days. For longer storage, freezing is your best friend. Wrap the unfrosted cake (or individual slices) tightly in plastic wrap, then in a layer of foil. It will keep in the freezer for up to 3 months. Thaw overnight in the refrigerator and bring to room temperature before serving to restore that perfect, tender texture.
Try This key lime cake Yourself
We genuinely hope you give this recipe a try. There’s something so rewarding about pulling a golden, citrus-scented key lime cake from your own oven.
This recipe has become a go-to in our own kitchens for everything from birthdays to simple weekend treats. It’s the kind of key lime dessert that feels special without being fussy. We encourage you to grab those limes and get baking. Don’t be intimidated—the steps are straightforward, and the result is incredibly impressive. Share it with friends, bring it to a potluck, or simply enjoy a quiet slice with a cup of coffee. Once you taste that perfect balance of sweet and tart, we think you’ll understand why we love this key lime cake so much.
Key Lime Cake
Ingredients
Equipment
Method
- Preheat your oven to 350°F. Grease and flour a 10-inch Bundt pan or two 9-inch round cake pans, tapping out any excess flour.
- In a medium bowl, whisk together the flour, baking powder, baking soda, and salt until well combined and set aside.
- In a large mixing bowl, beat the butter and sugar together on medium-high speed for 3 to 4 minutes, until light and fluffy. Beat in the eggs one at a time, fully incorporating each before adding the next, then mix in the vanilla extract and key lime zest.
- With the mixer on low speed, add the dry ingredients and buttermilk to the butter mixture in three alternating additions, beginning and ending with the dry ingredients. Mix just until the batter is smooth, then gently fold in the key lime juice by hand.
- Pour the batter into your prepared pan(s) and smooth the top. Bake for 45-55 minutes for a Bundt pan or 25-30 minutes for round layers, until a toothpick inserted into the center comes out clean.
- Let the cake cool in the pan on a wire rack for 15 minutes, then carefully invert it onto the rack to cool completely before frosting or serving.
Nutrition
Notes
Tried this recipe?
Let us know how it was!Enjoyed the recipe? Share it!

Kitchen Essentials We Recommend
Tools that make cooking easier — tried, tested, and loved.


As an Amazon Associate we earn from qualifying purchases.
Got a recipe the world should try?
Share your favorite family recipe or national dish with food lovers in 100+ countries.
Submit Your RecipeFrequently Asked Questions
Can I use regular limes instead of key limes?
Absolutely! Persian limes (the common grocery store variety) work perfectly well. You may want to use an extra tablespoon of juice, as key limes are often a bit more tart. The zest from regular limes will still give your key lime cake that wonderful bright aroma.
How do I know when the cake is done baking?
The cake is done when it’s golden brown, the edges just begin to pull away from the pan, and a toothpick or cake tester inserted into the center comes out clean or with a few moist crumbs. Avoid opening the oven door too early, as this can cause the cake to fall.
Can I make this into a layer cake?
Yes, this recipe adapts beautifully. Divide the batter between two greased and floured 9-inch round pans and bake for 25-30 minutes. Let the layers cool completely before stacking them with a generous layer of key lime frosting or cream cheese frosting.
Why is my cake dense and not fluffy?
A dense cake is often the result of overmixing the batter after adding the flour, which develops too much gluten. Make sure your leaveners (baking powder and soda) are fresh, and mix the dry ingredients in just until combined. Also, ensure your ingredients are at room temperature.
Conclusion
We hope this guide fills your kitchen with the incredible, sunny scent of baking citrus and gives you the confidence to create a stunning key lime cake. From the simple ingredient list to the tender, melt-in-your-mouth crumb, this recipe is a celebration of bright, joyful flavor. Whether you top it with a glossy glaze, turn it into cupcakes, or enjoy it perfectly plain, it’s a dessert that’s sure to bring smiles. So preheat that oven, zest those limes, and get ready for a truly delicious treat. Happy baking!
")