This simple, reliable homemade pizza dough yields a chewy, golden crust that's crisp on the bottom and tender inside. It's a forgiving recipe perfect for beginners and a versatile base for all your favorite toppings.
What Makes Joanna Gaines Pizza Dough So Special
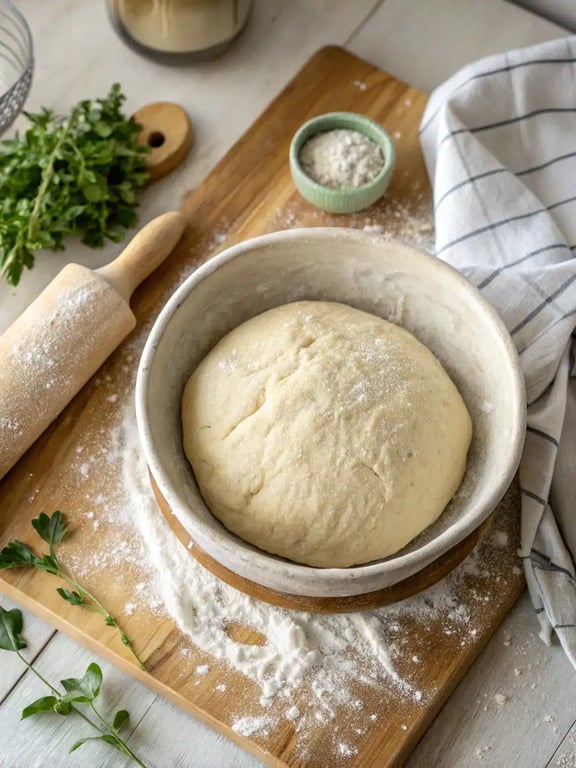
With just a handful of simple ingredients, Joanna Gaines pizza dough delivers a chewy, golden crust that’s crisp on the bottom and wonderfully tender inside. This homemade pizza crust is the perfect blank canvas for all your favorite toppings, transforming a regular weeknight into something special. It’s the kind of quick pizza dough that feels both rustic and reliable, creating a foundation for countless family meals. During our testing, we found the real magic of this best pizza dough is in its simplicity and flexibility. One team member noted, “It’s forgiving and rises beautifully every time, even for beginners.” You’re going to love how this easy pizza dough comes together with minimal fuss for maximum flavor.
This post may contain affiliate recommendations. Please see our disclosure policy.
What You’ll Find in This Article
Ingredients for Joanna Gaines Pizza Dough
You only need a few pantry staples to make this fantastic Joanna Gaines pizza dough. Consequently, you can likely start this recipe right now without a special trip to the store. Here’s everything you’ll need for your homemade pizza crust:- 1 cup warm water (about 110°F)
- 2 1/4 teaspoons active dry yeast (1 standard packet)
- 1 teaspoon granulated sugar
- 2 tablespoons olive oil, plus more for the bowl
- 1 teaspoon fine sea salt
- 2 1/2 to 3 cups all-purpose flour, plus more for dusting

Cook Time for Homemade Pizza Crust
We know your time is precious, so we’ve broken down the timeline for this easy pizza dough. While the rising time is mostly hands-off, the active work is surprisingly quick. Here’s what you can expect:- Prep Time: 20 minutes (plus 10 minutes of hands-on kneading)
- Rise Time: 1 to 1.5 hours
- Cook Time: 12-15 minutes
- Total Time: About 1 hour 45 minutes (mostly inactive)
How to Make Easy Pizza Dough
Follow these simple steps to create your best pizza dough yet. We’ve included our team’s little insights along the way to ensure your success.Step 1: Activate the Yeast
In a large bowl, combine the warm water, yeast, and sugar. Let it sit for about 5-10 minutes until the mixture is foamy, which means the yeast is active.Step 2: Build the Dough Base
Stir the olive oil and salt into the yeast mixture. Begin adding the flour, one cup at a time, stirring with a wooden spoon until a shaggy dough forms.Step 3: Knead to Perfection
Turn the dough out onto a lightly floured surface and knead for 5-7 minutes, adding just enough of the remaining flour to prevent sticking, until the dough is smooth and elastic.Step 4: Let It Rise
Lightly oil a clean bowl, place the dough in it, and turn to coat. Cover with a damp kitchen towel and let rise in a warm spot for 1 to 1 1/2 hours, or until doubled in size.
Step 5: Punch and Rest
Punch down the risen dough to release the air. Turn it out onto your work surface and let it rest for 10 minutes to relax the gluten.Step 6: Shape Your Crust
Shape the dough into your desired pizza crust on a piece of parchment paper. For a thin crust, roll or stretch it to about a 12-inch circle. For a thicker crust, leave it slightly thicker.Step 7: Preheat and Top
Preheat your oven to 475°F with a pizza stone or baking sheet inside for at least 30 minutes. Top your shaped dough with sauce and desired toppings.Step 8: Bake to Golden Brown
Carefully transfer the pizza (on the parchment) to the hot stone or sheet. Bake for 12-15 minutes, until the crust is golden brown and the cheese is bubbly. Let cool for a few minutes before slicing.
Pro Tips & Tasty Tweaks
After making this Joanna Gaines pizza dough countless times, our team has gathered some foolproof tips. These small adjustments can make a big difference in your final result.- Flavor Swap: For a richer flavor, substitute one tablespoon of the olive oil with melted butter.
- Heat Adjustment: If your oven runs hot, check the pizza a few minutes early. Conversely, if your crust isn’t browning, move it to a higher rack for the last 3 minutes.
- Texture Fix: If the dough feels too sticky while kneading, resist adding too much flour. Instead, lightly oil your hands to prevent sticking without making the dough tough.
- Storage Tip: You can refrigerate the shaped, topped pizza (unbaked) on parchment for up to 4 hours before baking. This is perfect for getting ahead for dinner parties.
Flavor & Texture Notes
When you make this Joanna Gaines pizza dough correctly, you’ll be rewarded with a crust that has a fantastic balance. The exterior should have a crisp, slightly chewy bite with those signature leopard-spotted bubbles from the high heat. Meanwhile, the interior crumb is tender and airy, with a subtle sweetness from the yeast and a hint of richness from the olive oil. Your doneness signals are visual and auditory. Look for a deep golden-brown color on the edges and bottom. Additionally, the crust should sound hollow when you gently tap it. This quick pizza dough recipe yields a robust crust that can hold up to hearty toppings without getting soggy.Variations & Substitutions
One of the joys of this best pizza dough recipe is how adaptable it is. We love experimenting in our test kitchen, and here are some of our favorite twists that keep the recipe fully accessible.- Herb-Infused Crust: Knead 2 tablespoons of finely chopped fresh rosemary or basil into the dough along with the flour for a fragrant, garden-fresh base.
- Whole Wheat Blend: For a nuttier flavor and more fiber, substitute up to half of the all-purpose flour with whole wheat flour. You may need a touch more water.
- Garlic or Cheese Twist: Incorporate 2 teaspoons of garlic powder or 1/4 cup of grated Parmesan cheese into the dry flour for an extra savory punch.
- Sweet Dessert Pizza Base: Add an extra tablespoon of sugar to the dough. After baking, top with mascarpone, fresh fruit, and a drizzle of honey for a fantastic dessert.
- No Yeast? No Problem: In a pinch, you can use 2 1/2 teaspoons of baking powder mixed into the flour. Skip the rise time, shape immediately, and bake. The texture will be more biscuit-like but still delicious.
Make-Ahead & Scaling
We love how flexible this Joanna Gaines pizza dough is for planning ahead. Consequently, you can easily fit it into your schedule, whether you’re prepping for a busy week or a weekend gathering. This homemade pizza crust holds beautifully, so you can enjoy fresh-baked flavor with minimal last-minute effort. For make-ahead, you have a couple of great options. First, you can prepare the dough through the first rise, then punch it down, wrap it tightly in plastic, and refrigerate it for up to 24 hours. When you’re ready, let it sit at room temperature for 30 minutes before shaping. Alternatively, you can fully shape the crust on parchment, add your sauce and toppings, and refrigerate the assembled pizza for up to 4 hours before baking—this is our team’s favorite trick for stress-free entertaining. Scaling this best pizza dough is straightforward. To double the batch for a crowd, simply double all ingredients. We recommend dividing the risen dough into two balls before the final rest to make shaping easier. For a smaller batch, you can halve the recipe perfectly. Just remember that a smaller amount of dough will rise a bit faster, so keep an eye on it. Ultimately, whether you’re making one pizza or four, this quick pizza dough adapts to your needs without compromising its wonderful texture.How to Serve Joanna Gaines Pizza Dough
Once you pull that golden, bubbly pizza from the oven, the fun really begins. We think the best way to serve this Joanna Gaines pizza dough is straight from the oven, sliced into wedges on a large cutting board. It encourages everyone to gather around and dig in while the cheese is gloriously stretchy. During our testing, one of our favorite discoveries was how this easy pizza dough acts as a perfect canvas. For a classic night, pair it with a simple, crisp green salad dressed with a tangy vinaigrette to cut through the richness. If you’re hosting, set up a topping bar with small bowls of extras like fresh basil, red pepper flakes, and a drizzle of good olive oil so everyone can customize their slice. We often joke that the only thing better than the pizza itself is the moment of quiet satisfaction when you see your family or friends enjoying it. This homemade pizza crust turns a simple meal into a shared experience, which is why we keep coming back to it.
Mistakes to Avoid
We’ve made our share of pizza over the years, so we know the little pitfalls that can trip you up. Here are the most common mistakes we see with this Joanna Gaines pizza dough and how to steer clear of them for the best pizza dough results every time. First, using water that’s too hot is a yeast killer. If your water is hotter than 110°F, it can deactivate the yeast, leaving you with a dense crust. Always use a thermometer or test it on your wrist—it should feel warm, not hot. Conversely, if your dough isn’t rising at all, your yeast might be old or your kitchen too cold. Another frequent issue is over-flouring the dough during kneading. While it’s tempting to keep adding flour to a sticky dough, this can make your homemade pizza crust tough and dry. Instead, lightly oil your hands and the work surface. The dough will become less sticky as you knead and the gluten develops. Finally, don’t skip preheating your baking surface. A common question we get is, “Why isn’t my crust crispy on the bottom?” The answer is almost always an under-heated pizza stone or baking sheet. That full 30-minute preheat is non-negotiable for achieving that perfect, crisp foundation on your quick pizza dough. By avoiding these simple errors, you’ll unlock the full potential of this wonderfully reliable recipe. Trust us, a little attention to detail makes all the difference.How to Store Joanna Gaines Pizza Dough
Good news: this Joanna Gaines pizza dough stores beautifully, so you can enjoy it now and later. We’ve tested every storage method to give you the best results for your homemade pizza crust. For short-term storage, place any leftover baked pizza in an airtight container in the refrigerator for up to 3 days. To reheat, we avoid the microwave, which makes the crust soggy. Instead, place slices directly on the oven rack or in a skillet over medium-low heat for a few minutes until the crust re-crisps and the cheese melts again. You can also freeze this dough with great success. After the first rise, punch down the dough, shape it into a ball, and wrap it tightly in plastic wrap and then foil. Freeze for up to 3 months. To use, thaw it overnight in the refrigerator, then let it come to room temperature before shaping and baking. You can even freeze the fully baked pizza; just wrap slices individually for easy single-serving lunches. Our team found that a double-wrap method is key to preventing freezer burn, ensuring your future easy pizza dough tastes just as fresh.Try This Joanna Gaines Pizza Dough Yourself
We genuinely hope you give this Joanna Gaines pizza dough a try in your own kitchen. There’s something incredibly rewarding about pulling a homemade pizza out of your oven, smelling that incredible aroma, and knowing you made it from scratch. This recipe has become a staple in our own homes because it consistently delivers. It’s the kind of best pizza dough that builds confidence—forgiving for beginners yet satisfying for experienced cooks looking for a reliable foundation. We encourage you to make it your own. Start with the classic version, then maybe next time add some herbs to the dough or try a new topping combination. Gather your simple ingredients, clear a little counter space, and treat yourself to the process. We’re confident this quick pizza dough will earn a permanent spot in your recipe rotation, creating many delicious meals and happy memories around your table.Joanna Gaines Pizza Dough
This simple, reliable homemade pizza dough yields a chewy, golden crust that's crisp on the bottom and tender inside. It's a forgiving recipe perfect for beginners and a versatile base for all your favorite toppings.
Ingredients
Equipment
Method
- In a large bowl, combine the warm water, yeast, and sugar. Let it sit for 5-10 minutes until the mixture is foamy, indicating the yeast is active.
- Stir the olive oil and salt into the yeast mixture. Begin adding the flour, one cup at a time, stirring with a wooden spoon until a shaggy dough forms.
- Turn the dough out onto a lightly floured surface and knead for 5-7 minutes, adding just enough of the remaining flour to prevent sticking, until the dough is smooth and elastic.
- Lightly oil a clean bowl, place the dough in it, and turn to coat. Cover with a damp kitchen towel and let rise in a warm spot for 1 to 1 1/2 hours, or until doubled in size.
- Punch down the risen dough to release the air. Turn it out onto your work surface and let it rest for 10 minutes to relax the gluten.
- Shape the dough into your desired pizza crust on a piece of parchment paper. For a thin crust, roll or stretch it to about a 12-inch circle. For a thicker crust, leave it slightly thicker.
- Preheat your oven to 475°F with a pizza stone or baking sheet inside for at least 30 minutes. Top your shaped dough with sauce and desired toppings.
- Carefully transfer the pizza (on the parchment) to the hot stone or sheet. Bake for 12-15 minutes, until the crust is golden brown and the cheese is bubbly. Let cool for a few minutes before slicing.
Nutrition
Notes
Pro Tips: For richer flavor, substitute 1 tbsp olive oil with melted butter. If dough is sticky while kneading, lightly oil your hands instead of adding more flour. Ensure your baking surface preheats for the full 30 minutes for a crisp bottom crust.
Storage: Refrigerate shaped, topped pizza (unbaked) on parchment for up to 4 hours before baking. Leftover baked pizza keeps in the fridge for up to 3 days; reheat on oven rack or skillet to re-crisp.
Storage: Refrigerate shaped, topped pizza (unbaked) on parchment for up to 4 hours before baking. Leftover baked pizza keeps in the fridge for up to 3 days; reheat on oven rack or skillet to re-crisp.
Tried this recipe?
Let us know how it was!Enjoyed the recipe? Share it!

Kitchen Essentials We Recommend
Tools that make cooking easier — tried, tested, and loved.


As an Amazon Associate we earn from qualifying purchases.
Got a recipe the world should try?
Share your favorite family recipe or national dish with food lovers in 100+ countries.
Submit Your RecipeFrequently Asked Questions
Can I make Joanna Gaines pizza dough without a stand mixer?
Absolutely! This easy pizza dough is designed to be made by hand. We actually prefer hand-kneading for this recipe, as it gives you a better feel for the dough’s texture. Just mix with a wooden spoon in a bowl until shaggy, then turn it out and knead on a floured surface for 5-7 minutes until smooth and elastic.
How do I know when my pizza dough has risen enough?
The dough should roughly double in size, which usually takes 1 to 1.5 hours in a warm spot. A reliable test we use is the finger poke test. Gently press a finger about an inch into the dough. If the indentation remains and doesn’t spring back quickly, your Joanna Gaines pizza dough is perfectly risen and ready for the next step.
Why is my homemade pizza crust tough?
A tough crust is often the result of over-kneading or using too much flour. When kneading your homemade pizza crust, stop once it becomes smooth and elastic. Also, resist the urge to add more flour than necessary to combat stickiness; a slightly tacky dough is better than a dry one. Finally, don’t skip the 10-minute rest after punching down, as this allows the gluten to relax for easier shaping.
Can I use instant yeast instead of active dry yeast?
Yes, you can substitute instant yeast in this best pizza dough. Use the same amount (2 1/4 teaspoons). The main difference is you can mix instant yeast directly into the dry flour, skipping the initial foaming step with the warm water and sugar. Your rise times may be slightly shorter, so keep an eye on the dough.
")